 F. L. I. G.

When I first started to think about the Nature’s Bounty challenge, I decided to try and find a way to automatically detect apples using a camera and OpenCV. My thinking was roughly:
- Apples are of a known size and colour (and there is nothing else around that’s round or red).
- Apple detection should be relatively generic, in the sense that we shouldn’t rely too much on knowledge about their expected positions on the tree.
- We’re only detecting apples, not tree branches (so apples are just “floating” in space, and we can grab them freely – but we might try to do this “cautiously”, expecting some invisible branches might be in the way).
- Apple detection should be as simple and efficient as possible (better to refine readings continuously as we get closer than to try something “perfect” that might be too slow or resource-hungry).
What is Red?
The first problem to solve is detecting the colour red (anything red = apple in our simple world). This might sound trivial, and a naive approach might be to just look at the “red” channel from the well-known RGB colour space. This is what we would get:
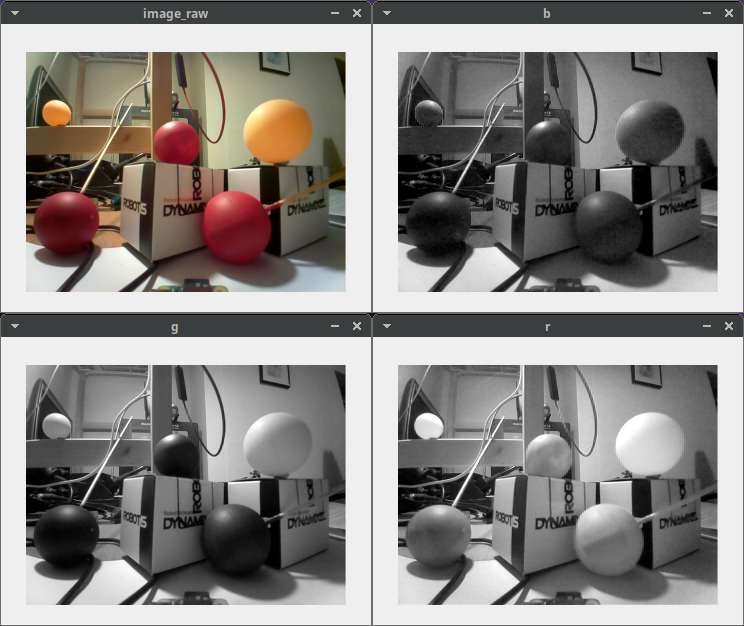
From this, it’s obvious that the “red” channel from RGB doesn’t really mean “things that look red”: the apples don’t really stand out. Also, a white object could have just as much red as a red apple. If you look closely at the last picture (red channel), you can see that the small red writing on the box in the middle completely disappears!
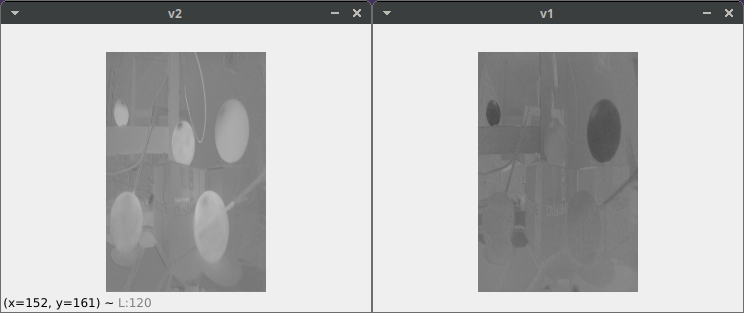
Using an alternative colour space, YUV, looks much more interesting:
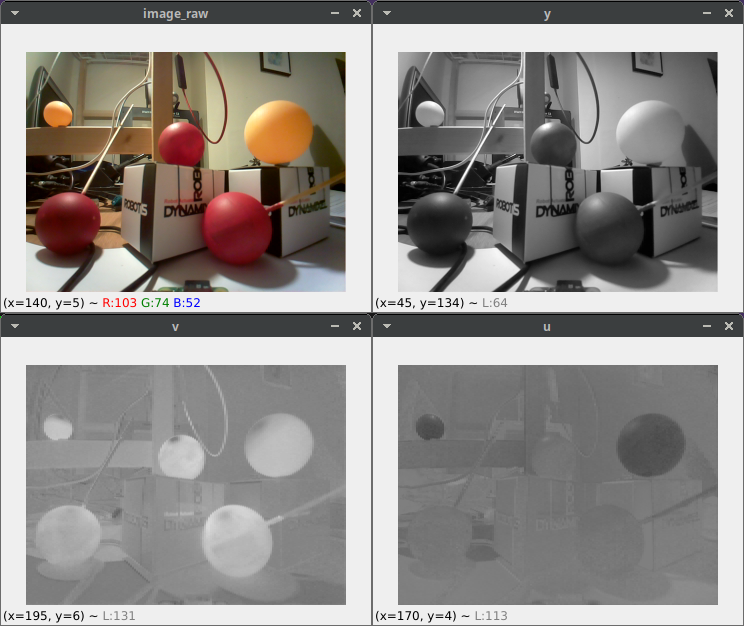
Both the yellow and red apples and the small red writing clearly stand out in “V”. Even in different lighting conditions:

YUV isn’t perfect, it’s not the closest representation to human perception, but it has one great advantage: we can get it for “free” from the camera hardware! If it’s good enough to detect red things, we could save some cycles by not having to do colour space conversions. What comes out of the camera is something called “YUV422”: U and V have half the resolution horizontally compared to Y, and they are interlaced, so we get a jumbled image:
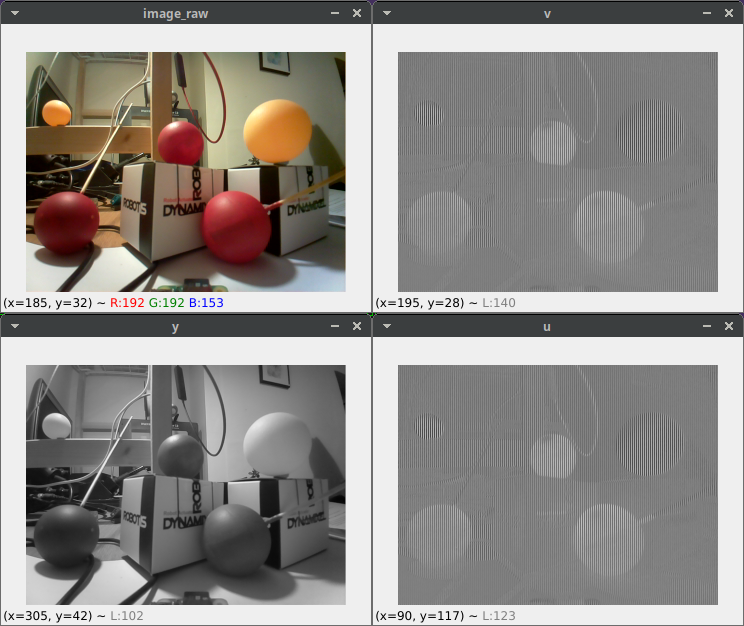
When we extract U and V properly, we get this:
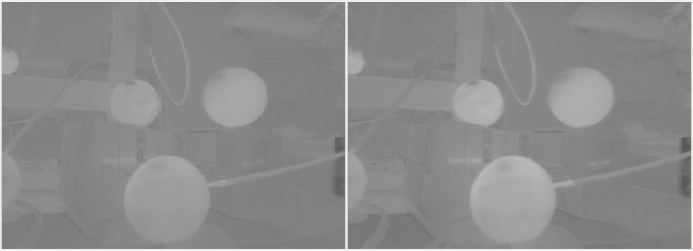
Now we have a choice: either double the resolution we ask from the camera and halve our V image vertically, or keep the original resolution and enlarge V horizontally, accepting that we lose some information. The result from the latter seemed perfectly fine. Here is a comparison: the first image is from converting RGB to YUV (so no information loss), the second one is from extracting V from YUV422 and then resizing.
So how is our performance? Comparing the two methods (get RGB from camera and convert to YUV vs. getting YUV422 and extracting & resizing) didn’t show a big difference when run on a PC, but on the Raspberry Pi, the second method was almost twice as fast (1.5 ms vs. 2.8 ms)!
What is an Apple?
As we said earlier, in our simplified world everything that’s red and round is an apple. We can further simplify this and assume there are no other red things – therefore, if it’s red, it must be round, so it must be an apple! So with OpenCV, we’re trying to detect red circles like this:
-
Start with a grayscale image from the “V” channel:
-
Apply blur (
GaussianBlur) to smooth things a bit -
Apply a simple threshold (
threshold) to only keep what we consider “red”
-
Apply “erosion” around shapes (
erode) to get rid of noise (small spots)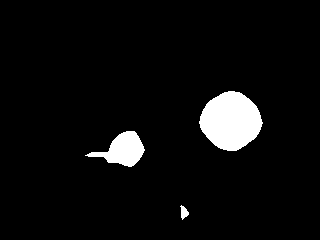
-
Find contours: get a list of polygons around the red shapes we detected (
findContours) -
For each polygon, find their minimum enclosing circle (
minEnclosingCircle) and increase the radius to compensate for the previous erosion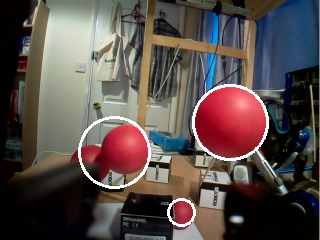
And that’s it! As you can see on the last image, overlapping apples might cause a bit of a trouble… but let’s ignore this problem for now!
How Far is an Apple?
So far, everything was in 2D. We don’t have stereo vision, but what we need is really not circles but 3D coordinates of apples. We can see where the circles are in the 2D image (X and Y coordinates) and apples that are closer will look bigger than those far away, so the radius might give us the extra dimension (Z). Luckily, we are not looking at arbitrary objects, but apples with a known, uniform diameter: exactly 40 mm!
This means that by also knowing some properties of our camera (how it projects the 3D world onto a 2D plane), we can work out the actual 3D positions of the apples we see!
From the Wikipedia link above:
height of image (mm) = focal length (mm) * height of object (mm) / distance of object (mm)
So to get the coordinates:
z = distance of object (mm) = focal length (mm) * height of object (mm) / height of image (px)
x and y: just multiply the 2D pixel coordinates of the circles by height of object (mm) / height of image (px)
For this to work, we need one crucial piece of information: the focal length of our camera. This can be determined by a camera calibration tool included with OpenCV. (Can also be used from ROS.) The process involves printing out a checkerboard pattern and showing it to the camera at different angles and distances. At the end you get a camera matrix, which includes focal length!
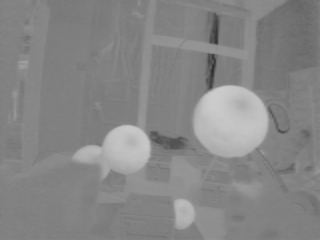
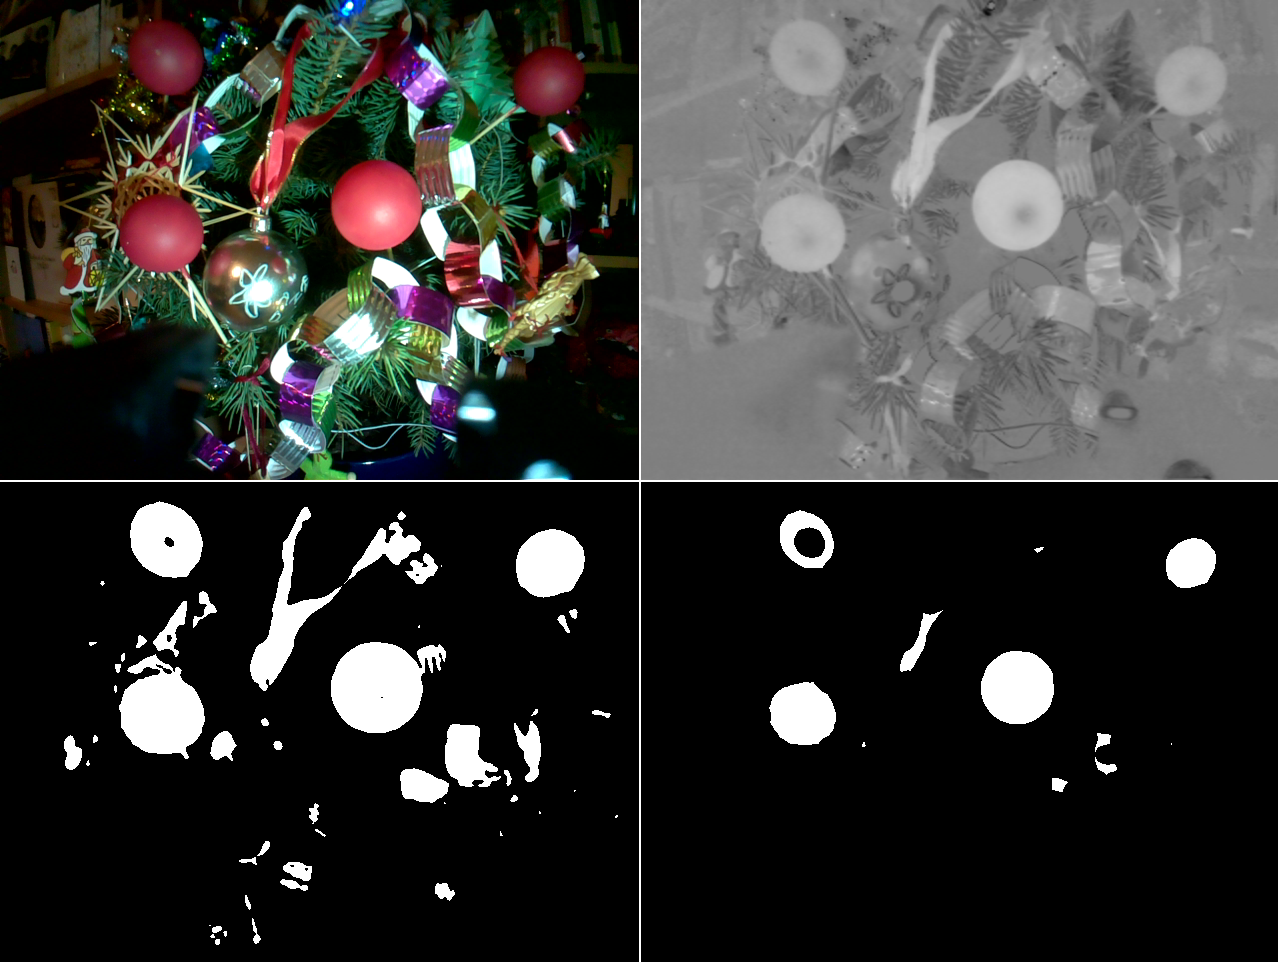
And as another experiment, let’s see what we get when we’re looking at something that’s not quite a regular apple tree. The original image, followed by the OpenCV processing steps from the “V” channel to erosion:
…and the detected apple positions:
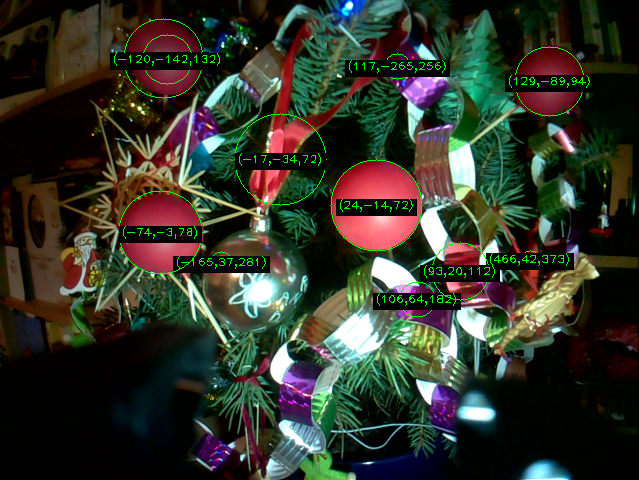
I suppose if all you have is an apple detector, then everything will look like an apple… (But that “negative apple” at the top left was a surprise!)
Comments
Comments powered by Disqus